Linux dd disk image. Creating a bootable USB flash drive for installing Windows using Rufus
To create a hard disk image, it is not necessary to use utilities like Acronis True Image or Norton Ghost, a simple dd utility is enough, which is included with most Unix-like operating systems (Linux, FreeBSD, Solaris, etc.) The article describes a simple way creation backup image hard drive using dd. The first step is to prepare for backup. In this article, we introduce the following notation:
- /dev/sda - disk to be imaged;
- /dev/sdb - the disk where the image will be written to.
Substitute your own values if necessary.
Preparing to create a hard drive image
The first step is to boot from any available Live CD, which has the dd utility, and enter into command line as superuser. Create a mount point for backup.
mkdir /mnt/backup
Mount the hard drive on which you want to save the image.
Create a hard drive image
dd if=/dev/sda of=/mnt/backup/sda.img bs=8M conv=sync,noerror
- if=/dev/sda - copy the entire sda hard drive;
- of=/mnt/backup/sda.img - copy to /mnt/backup/sda.img;
- bs=8M - set the size of the hard disk cache to speed up the copying procedure (otherwise the data will be dumped in small portions of 512 bytes);
- conv=sync,noerror - tell dd to copy bit-for-bit, ignoring read errors.
To reduce the size of a hard disk image, you can compress it with any archiver.
dd if=/dev/sda bs=8M conv=sync,noerror | gzip -c > /mnt/backup/sda.img
Restoring a hard drive image
To restore a hard disk image, you need to follow the procedure reverse to the procedure for creating this image.
dd if=/mnt/backup/sda.img of=/dev/sda bs=8M conv=sync,noerror
When using compression in parallel, you must unzip the image.
gunzip -c /mnt/backup/sda.img | dd of=/dev/sda conv=sync,noerror bs=8M
Migrating the system to another hard drive
To migrate the entire system to another hard drive, you must set the destination of the new drive as the destination.
dd if=/dev/sda of=/dev/sdb bs=8M conv=sync,noerror
Then, if necessary, install the boot from given hard disk. Provided that new hard the disk is larger than the old one, unallocated area will remain on it. It should be marked and formatted according to existing requirements.
Copy statistics in dd
The main disadvantage in dd is the lack of a visual representation of the statistics of the execution of the copy procedure. However, this disadvantage can be easily circumvented. It is enough to connect to another terminal.
Determine the process number under which dd is running.
Send periodically this process kill -USR1 dd_process_number.
watch -n 5 kill -USR1 dd_process_number
- watch -n 5 - run command every 5 seconds;
- kill -USR1 dd_process_number - show copy statistics.
So, suppose you have downloaded an ISO file with a distribution image and prepared a flash drive.
The terminal command for writing the iso image of the distribution is as follows:
sudo dd if=path to .iso of=/dev/sdb
Where instead path to .iso you need to specify the path to the iso file from your folder Downloads.
sdb at the end of the command, this is the flash drive on which the image will be written. To identify your flash drive, run in a terminal:

And if your flash drive is defined differently, change it in the command.
To correctly enter the path to the file in the command, open the folder with the file, open the nearby terminal and drag the file into it:

The terminal will display the path to the file and the .iso file itself. Copy it without quotes and paste it into the command, and in the terminal press the keyboard shortcut ctrl+c to reset and display a new prompt string.
The easiest way to create a command is in a text editor.
I got the following command:

Now insert the USB flash drive into the port of the computer, copy the received command from text editor, type in the terminal and execute (press Enter):

The terminal cursor will blink and it seems that nothing is happening, but in fact there is a recording. Wait for the image recording to finish and at the end you should see something like the following in the terminal:

That's all. Your flash drive has become bootable and you can now install the distribution on any computer.
This is a configurable setting that determines the type and use of the bootable USB drive that is created.
There are four download methods available in the Rufus utility, one of which must be selected from the drop-down list. In the list they are designated as MS-DOS, FreeDOS, ISO-image, DD-image. The first two are available only for computers and devices with a BIOS - they must be selected from the drop-down list in the "Partition scheme and system interface type" line.

This upload method in Rufus creates bootable flash drive with MS-DOS operating system. This is a disk operating system that may be required in the following cases:
- to update and flash the BIOS, it is safer to perform this procedure from under DOS;
- for diagnosing and testing a computer or laptop, since most utilities for in-depth diagnostics of RAM or a hard drive work only under DOS;
- if you need to access files on your hard drive with a missing or corrupted operating system;
- when using old console programs (for example, for programming peripherals), which may not work correctly under Windows;
- if you need access to the file system hard drives computer or laptop at a lower level.

FreeDOS is an operating system similar to MS-DOS that is free under a free license and available from Rufus. Also allows you to update the BIOS, repair HDD with help special programs, test RAM(RAM) and more. Actions are performed by special commands from the command line.

The ISO image boot method should be selected to transfer the finished boot disk ISO image to a USB flash drive. An ISO image must be created in advance using the programs designed for this. This method can be used in operating Windows systems, Linux, and others. Received boot disk can then be used for operating system disaster recovery and hard drive diagnostics.
Rufus DD image upload method
Used to create boot disks from images created in the operating system. Linux system DD program. The fundamental difference of this loading method is that the DD program does not actually create an image, but makes a bit-by-bit copy of the given directory.
Rufus is not something unique in the field of creating bootable media, its main advantage is ease of use.
Rufus- free software open source code for formatting removable USB storage media and creating bootable disks with various operating systems. The program is easy to use, high speed work and supports multilingual interface.
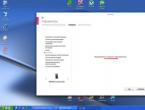
You can download the program on the developer's website. The page contains links to download the standard version Rufus, and portable Rufus portable, which do not differ in anything, except for the name of the executable file and the location where the settings are stored. The program settings include the language used and the settings for checking for updates. The standard version stores these settings in the registry, while the portable version stores them in a file rufus.ini program directory. Rufus does not require installation in the system - just download executable file and run it. The program interface is very simple:
In general, the program Rufus is not something unique in the field of tools for creating bootable media and its main advantage is ease of use. In order to create a bootable flash drive with its help, it is enough to have the initial image of the bootable system and be able to click on the “Start” button. All selectable parameters and settings, by default, are already designed for using the program to work on a computer with a standard configuration.
The most simple and convenient to use Rufus to create a bootable USB flash drive (bootable USB disk) from ISO images of installation Windows drives or Linux, as well as emergency system recovery disks and diagnostic tools.
When creating a bootable Windows flash drive, it is enough to select the device to which the recording will be performed and the file bootable iso image. The program will substitute other parameters itself.
If there is no ISO image file available, then it can be created based on a physical CD (or from a set of distribution files) using CD / DVD burning programs such as the well-known Nero, Alcohol, or freely distributed CDBurnerXP or ImgBurn.
The procedure for creating a bootable Windows flash drive is as follows:
select the flash drive to which the image will be written. Unlike many similar programs, Rufus displays the volume label, drive letter and size, so if there are several removable drives in the system, it's easy to choose the one to write to.
select partition scheme and system interface type. Rufus allows you to create flash drives for booting in a regular BIOS interface and for booting in a UEFI environment, create boot records for MBR volumes and GPT volumes. The default mode is "MBR for computers with BIOS or UEFI" - the most common mode for bootable flash drives today.
select the file system that will be used on the created bootable flash drive. By default, bootable Windows flash drives use the file system FAT32, but if necessary, you can choose NTFS if you want to use files larger than 4 GB.
set the cluster size. The cluster size is selected by the program based on the image data and type file system, but you can change it if necessary.
specify the volume label that will be set for the created flash drive.
set formatting options. These options are best left as default and just select the file ISO image. For images created by the program dd on Linux, you need to select the option DD image.
After pressing the button Start the program will format the flash drive, set the sign of the active partition, write the main boot record and the partition boot record, as well as bootable media data from the ISO image. After completion of work Rufus you can boot using the resulting bootable flash drive.
Using virtualization technology to test bootable flash drives. Download links for free and convenient programs to simplify the process of creating, debugging and checking the created bootable media.